Dear Reader, let us we know that, “How to install WordPress On Your Windows Operating System“So in this Tutorial We Learn Step By Step WordPress Installation Process.
WordPress is an online, open source website creation tool written in PHP. But in non-geek speak, it’s probably the easiest and most powerful blogging and website content management system (or CMS) in existence today.
WordPress is one Most Popular CMS in the World, Currently 60 Million Users used WordPress , Thousands of Plugins are Available of Wordpres and Different types of Theme are also available which full fill your requirement. If you used WordPress for development of any Blog/Website then you need to do little bit of code.
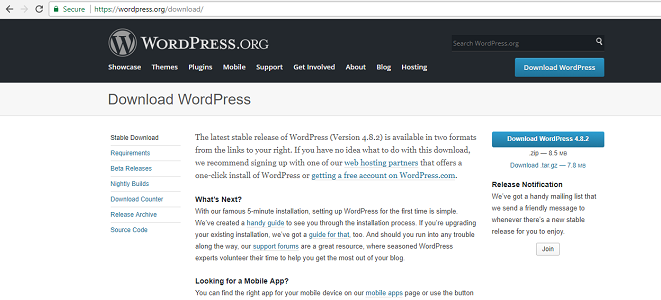
Step 1. Download Latest version of WordPress at first
Step 2. Copy Downloaded folder of WordPress where you Download it
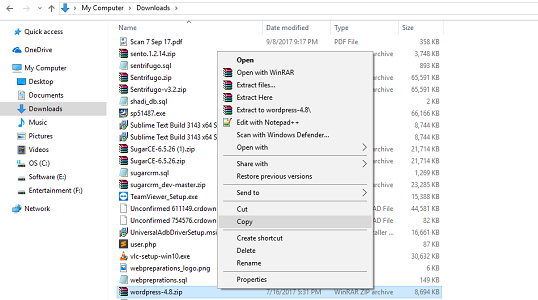
Step 3. Copy here WordPress folder

Step 4. Extract here WordPress folder

Step 5. Rename WordPress folder which name you want “wordpress_demo” and paste all WordPress files in that folder

Step 6. Open XAMPP Server Control and start Apache and MySQL

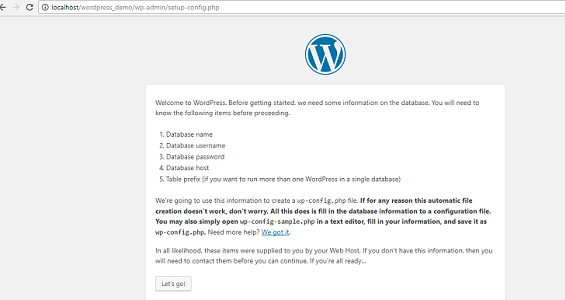
Step 7. Now open Browser and type in URL “localhost/your_project_folder_name” like “localhost/wordpress_demo” and press enter key, you see the WordPress Installation requirement
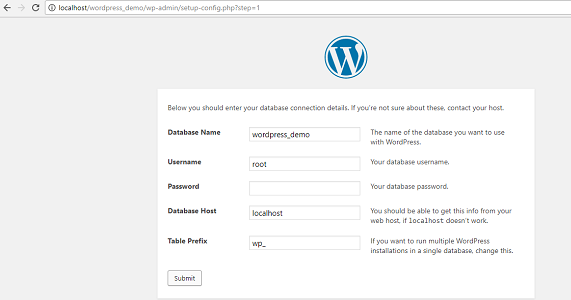
Basically, WordPress will now tell you that it will need your database name, password, and MySQL host information and click on let’s go button
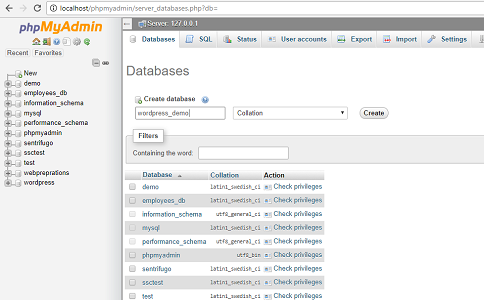
Step 8. go to phpmyadmin as type “localhost/phpmyadmin” type in your browser and create Database which name you want like “wordpress_demo”
Step 9. Fill Required information like Database Name, Username and then click on submit button.
Step 10. Your Installation is ready to install Click on “Run the Install” button to continue.

Step 11. WordPress will now create tables in your database and then send you to the next step of the installation.
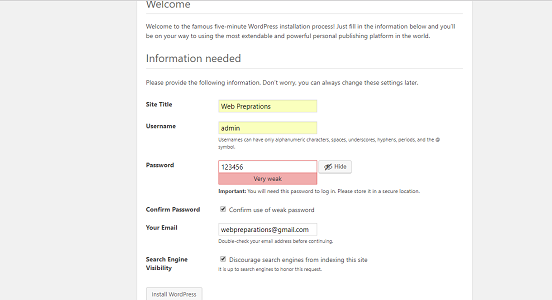
Now you need to provide some information for WordPress to set up your site. This includes site title, username, password, and admin email address.
If you do not want your website to be visible to search engines, then you can check the box next to search engine visibility. Later when you are ready you can change this from WordPress settings. If you are unsure about what to do, then simply leave it unchecked.
Click on the “Install WordPress” button to continue. WordPress will set up your website and finish the installation.
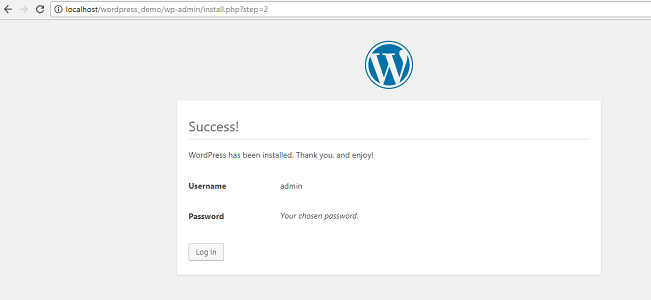
Step 12. You will see a success message showing your username. You can now click on the Log in button to sign in to your WordPress site.
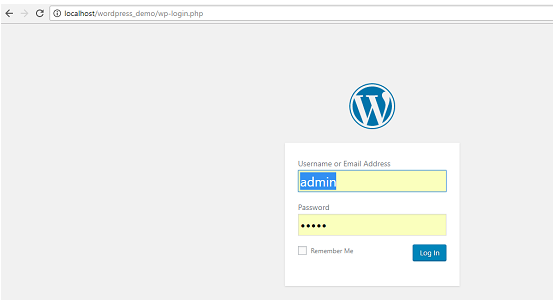
Step 13. Here you need to fill username and password for login in WordPress Admin Panel and click on “Login” button
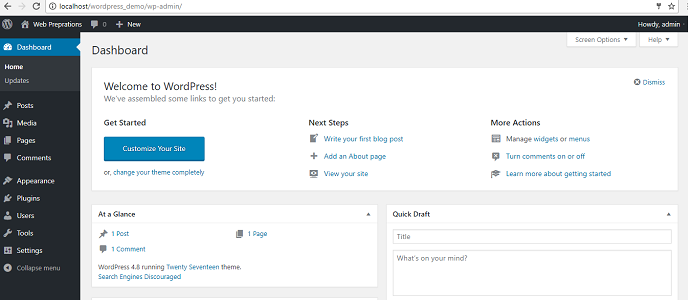
Step 14. This is Your WordPress Admin panel dashboard
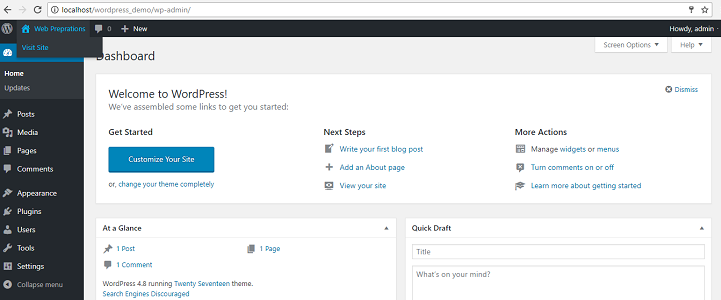
Step 15. If you want to Visit your actual Website then Click on Dashboard and click on your Home Title you can see an option like “Visit Site” or you can directly type in your browser “localhost/your_project_name” like “localhost/wordpress_demo”
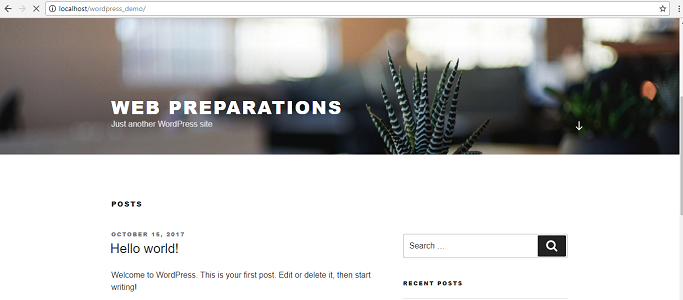
Step 16. Now finally this is your Actual website