Dear Reader, let us learn about “How to display Bootstrap Date Range Picker with 2 Months Calendar“. This is implemented with the help of Bootstrap and jQuery. Let us understand step by step.
Before going to learn about “How to display Bootstrap Date Range Picker with 2 Months Calendar“, we are displaying Date Picker using jQuery with Date Format of your choice.
Just copy and paste this code into your PHP file and see the result. Here you are able to change Date Format according to your choice.
|
1 2 3 4 5 6 7 8 9 10 11 12 13 14 15 16 17 18 19 20 21 22 23 24 |
<!doctype html> <html lang="en"> <head> <meta charset="utf-8"> <title>Date Picker </title> <link rel="stylesheet" href="//code.jquery.com/ui/1.8.24/themes/base/jquery-ui.css"> <script src="//code.jquery.com/jquery-1.8.2.js"></script> <script src="//code.jquery.com/ui/1.8.24/jquery-ui.js"></script> </head> <body> <div ><input type="text" id="datepicker" value=""/> </div> <script> $( "#datepicker" ).datepicker( { dateFormat:"dd-mm-yy", //minDate: new Date(), //maxDate: +1 }); </script> </body> </html> |

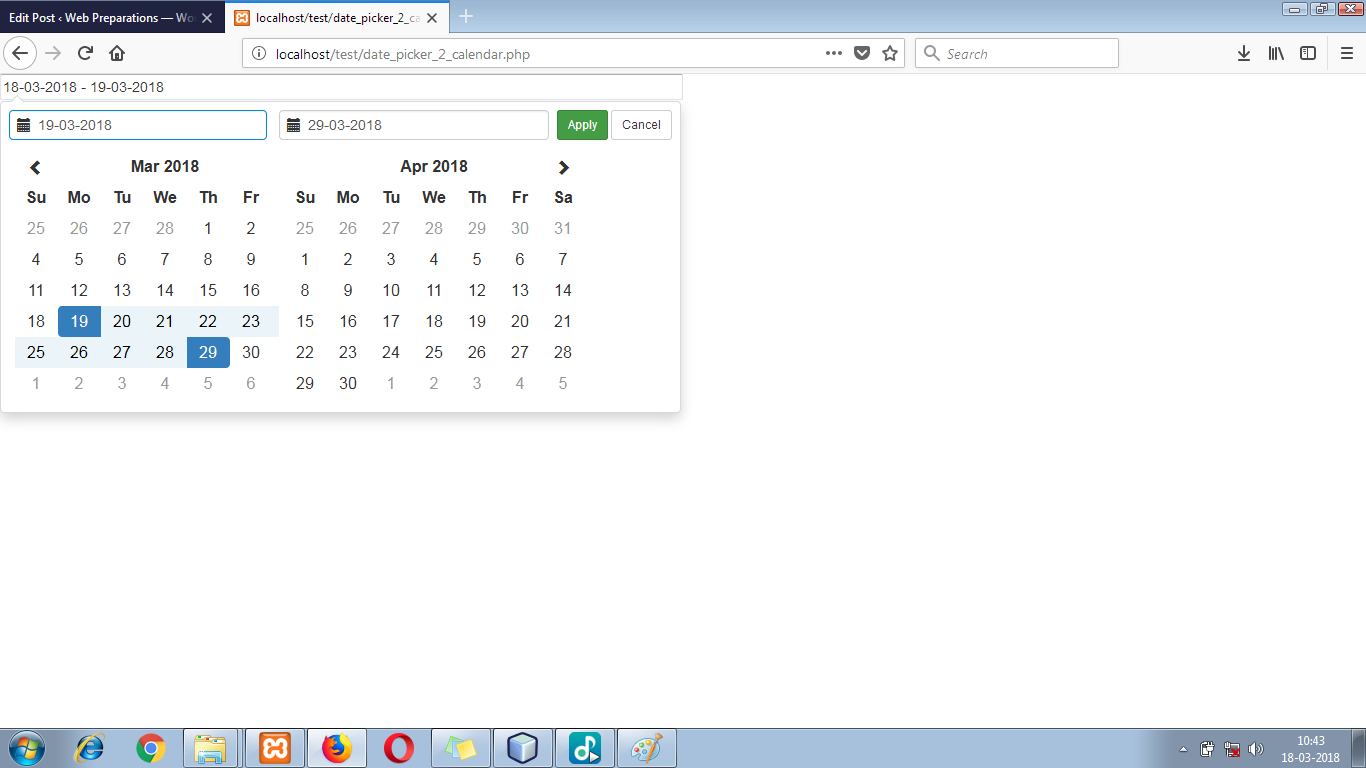
Now let us start for displaying “Bootstrap Date Range Picker with 2 Months Calendar“.
Step 1. Create date_picker.php
In this file add an input box for displaying date range. Here we are taking Current Date and Date next to today means Tomorrow.
Step 2. Set Date Range to the input box.
Step 3. Select Date Range from Calendar by clicking Apply button.
By selecting Date Range, you will be able to Apply the changes you have made.Now your Selected Range will be displayed into an alert. After clicking OK, that days will be set to the input box.
|
1 2 3 4 5 6 7 8 9 10 11 12 13 14 15 16 17 18 19 20 21 22 23 24 25 26 27 28 29 30 31 32 33 34 35 36 37 38 39 |
<!-- Include Required Prerequisites --> <script type="text/javascript" src="//cdn.jsdelivr.net/jquery/1/jquery.min.js"></script> <script type="text/javascript" src="//cdn.jsdelivr.net/momentjs/latest/moment.min.js"></script> <link rel="stylesheet" type="text/css" href="//cdn.jsdelivr.net/bootstrap/3/css/bootstrap.css" /> <!-- Include Date Range Picker --> <script type="text/javascript" src="//cdn.jsdelivr.net/bootstrap.daterangepicker/2/daterangepicker.js"></script> <link rel="stylesheet" type="text/css" href="//cdn.jsdelivr.net/bootstrap.daterangepicker/2/daterangepicker.css" /> <input type="text" name="daterange" value="" style="width:50%"/> <script type="text/javascript"> //Fri Mar 16 2018 14:57:52 GMT+0530 (India Standard Time) var fullDate = new Date(); //alert(fullDate +'fullDate'); //convert month to 2 digits var twoDigitMonth = ((fullDate.getMonth().length+1) === 1)? (fullDate.getMonth()+1) :(fullDate.getMonth()+1); var currentDate = fullDate.getDate() + "-" + twoDigitMonth + "-" + fullDate.getFullYear(); //alert(currentDate+'currentDate'); fullDate.setDate(fullDate.getDate()+1); // format a date var tomorrow = fullDate.getDate() + '-' + ("0" + (fullDate.getMonth() + 1)).slice(-2) + '-' + fullDate.getFullYear(); //alert(tomorrow+'tomorrow'); $('input[name="daterange"]').daterangepicker( { locale: { format: 'DD-MM-YYYY' }, startDate: currentDate, endDate: tomorrow }, function(start, end, label) { alert("A new date range was chosen: " + start.format('DD-MM-YYYY') + ' to ' + end.format('DD-MM-YYYY')); }); </script> |
Congratulations you have successfully learned “How to display Bootstrap Date Range Picker with 2 Months Calendar“, if this post is helpful for you then please share this post on social media and if you have any query then please contact us or comment below and don’t forgot us to follow and like on Social Media, Thanks.